Apple Picking in Sebastopol – Apple Cinnamon Pull-Apart Bread

Growing up in the southwestern part of the US, I missed out on a lot of produce picking since the desert isn’t as fertile as New England or California, except for those Hatch green chiles. So when my housemates suggested going apple picking a few weekends ago, I jumped at the opportunity to finally experience the manual labor of harvesting fruit.

In college, I went berry picking once with one of my friends at a farm outside of Austin. Although we had an awesome time, we were more focused on just looking at the berries (and having a photoshoot :P) rather than picking them. So we ended up picking only a handful of them. This time though, my housemates and I were serious about the harvest. We traveled to an apple farm in Sebastopol, a town about an hour away from the Bay Area. The farm actually has more acres of Asian pears than apples, but they only let people pick apples. That day, golden delicious and jonagold apples were in season. We were led to several rows of trees weighed down with ripe apples and we went straight to picking. Since the apples were so ripe, they were pretty easy to take off the trees. Some of them were so ripe that they just fell of the trees as we picked off other apples. After only about half an hour, we had several boxes filled with apples and headed back to weigh out our bounty. We ended up picking about 35 pounds of apples that day!

The farm also had many blackberry brambles and let us pick some blackberries. If you haven’t picked blackberries before, let me warn you, it’s rather difficult. Choosing ripe blackberries is a difficult task in itself since most of them are either not ripe enough or too ripe (i.e. they get squished when you pick them). On top of that, the blackberries rest in thorny brambles and to get the best ones, you end up getting scraped and scratched by the thorns. I gave up pretty early, but my housemates soldiered on and ended up picking about 3 pounds of berries.

With its apples and asian pears, the farm makes and sells asian pear apple juice, which is very delicious and refreshing. In order to pick apples, we had to sign up for a membership, which basically meant buying 12 bottles of juice. In addition to the juice, the farm also makes several different jams using asian pears, blackberries, and other fruits. We bought a jar of plum amaretto jam and a jar of asian pear, lavender, blackberry ginger jam (that’s a mouthful).

With 35 pounds of apples, I went right to work at baking up something delicious using apples. It didn’t take much effort to find apple recipes. Apparently, everyone is in the mood for apples now – Baked by Rachel is even posting an apple recipe each day. That’s how I found this recipe for cinnamon apple pull apart bread.

Pull-apart breads seem to be trendy these days. I’ve seen pins of all varieties all over Pinterest, from sweet ones (such as lemon and cinnamon sugar) to savory ones (i.e. cheddar, beer and mustard). This type of bread is a bit more complicated than others I’ve made before since you have to cut the dough into strips several times and then try to pack those strips into a loaf pan. And with the cinnamon filling, it turns out to be pretty messy. It was also a little difficult keeping all of the apples together on top of the dough and in between the strips.

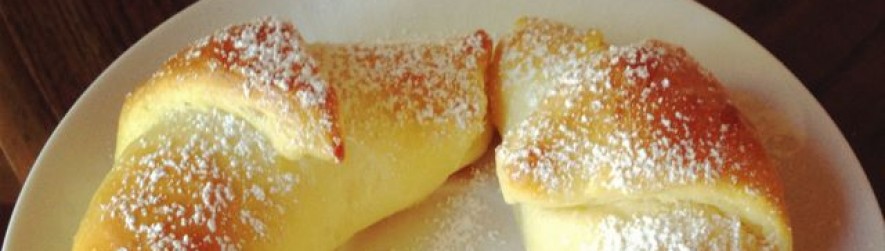
I’d like to say my bread baked up beautifully, but that was not the case. I let it rise for an hour, but perhaps this wasn’t enough time. When I baked the bread, the top browned, but inside seemed pretty undercooked. I baked it for nearly twice as long as the recipe says, but I think the bread was still a bit doughy. Perhaps it was because I used some leftover sweet dough that I froze and didn’t let it thaw enough before I used it?

Although I was pretty unsatisfied with the final product, my housemates enjoyed the bread. I had baked the bread late at night and left it out to cool, but when I woke up the next morning, 3/4 of the bread was gone! Later that day, they told me how delicious it was and asked for the recipe. So I guess the bread didn’t turn out that bad or my housemates like eating doughy bread. šŸ˜›

Apple Cinnamon Pull-Apart Bread
Adapted from this recipe

For the dough:
3 1/4 ā€“ 3 1/2 cups all purpose flour
1/4 cup sugar
1/2 teaspoon salt
3/4 teaspoon cinnamon
1 pkg or 2 1/4 teaspoons yeast
4 tablespoon butter, melted
1/3 cup lukewarm milk
1/4 cup lukewarm water
2 eggs
1 teaspoon vanilla

For the filling:
1/2 cup brown sugar
3/4 teaspoon cinnamon
1/2 teaspoon vanilla
3 tablespoons butter, melted
2 cups apples (I just sliced one large apple)

1. Dissolve 1 tablespoon of sugar in warm water and sprinkle yeast on top. Let rest for 10 minutes or until foamy.
2. Combine and mix the dry dough ingredients in a large bowl.
3. Add the yeast mixture and remaining wet dough ingredients to the dry mixture.
4. Mix the dough until it comes together. Move the dough onto a well-floured surface and knead for several minutes until dough is smooth. Add additional flour as needed.
5. Transfer dough to a lightly greased bowl. Cover with a towel or plastic wrap and allow to double in size, roughly one hour. (You can also refrigerate the dough overnight, but make sure to let dough sti at room temperature for 20-30 minutes to warm up before rolling).
6. Line a loaf pan with parchment paper.
7. Prepare the filling by combining the sugar, cinnamon, vanilla, and butter.
8. Thinly slice the apples and roll out dough, on a lightly floured surface, into a 12 x 20ā€³ rectangle (I just eyeballed this).
9. Spread the dough with the cinnamon filling and lay the apple slices on top.
10. Cut the dough into 6 sections, roughly 3 x 12ā€³. Carefully lay sections on top of each other, this will be messy and dough will stretch.
11. Cut dough the into 6 stacks. Turn stacks on their sides and tightly pack into prepared loaf pan.
12. Allow to rise for additional 30-60 minutes or until roughly doubled in size.
13. Bake at 350F for 45-55 minutes. (I ended up baking for nearly 90 minutes.) After 30 minutes, cover with foil and continue baking.
14. When bread is golden brown, remove from oven, cool on a wire rack, and enjoy!

This post has been Yeastspotted and submitted to Bake Your Own Bread.

Apple Ginger Brioche Rolls

Apples and ginger are two of my favorite ingredients… like seriously. I eat an apple everyday for breakfast and am a HUGE ginger fan. So much of a fan that I’ll just eat pickled ginger and candied ginger alone. So everĀ since I saw thisĀ recipeĀ for apple ginger brioche rolls, I’ve been dying to make them.

Being a bit afraid of butter, I’d always shy away from brioche recipes. Putting a whole stick (or even more) of butter into anything always grossed me out a bit. But I’ve since gotten over my little fear and have been wanting to make brioche for a while. I read somewhere that in earlier times, when butter was an expensive commodity and a sign of wealth, the amount of butter that was put into the dough showed how rich you were. So, a rich man’s brioche had a cup of butter while a poor man’s brioche had a mere two tablespoons. I love little food facts like that.

I decided to be more like a poor man, and keep the butter content on the low side. But if you wanted your bread to be richer, you could probably increase the butter. I also modified the filling a bit by adding a tablespoon of cinnamon. I used Saigon cinnamon, which seems to be a bit spicier, but only because that’s all we had. (Just a tip for you Costco shoppers, buy a big jar of Saigon cinnamon, it’s only $3!) If you aren’t a huge ginger fan, you might want to decrease the ginger a bit. Even I, a bonafide ginger lover, thought the heat from the ginger was a bit strong and had quite the kick.

The best part of these brioche rolls is that they will make your house smell amazing! From making the filling to baking the rolls, my mouth watered as I took in the aromas of the spices. However, be careful, these rolls are pretty messy. As I cut the rolled up dough, the filling oozed out. Not wanting to waste any of it, I coated a few pieces of the leftover dough with the delicious filling, which tasted amazing!Ā These rolls bake up beautifully and look just like baked goods you’d find at Starbucks, especially with the parchment paper wrapping. Your friends and family won’t believe it when you say you made them yourself. šŸ™‚

Apple Ginger Brioche Rolls
Adapted from this recipe

3 cups bread flour
2 tsp active dry yeast
1/2 cup warm milk
4 tbsp soft butter
2 eggs (lightly beaten)
3 tbspĀ sugar
1 apple, chopped into small cubes
2 tbspĀ brown sugar
1 tbspĀ ginger powder
1Ā tbsp cinnamon

2 tbspĀ sugar and 2 tbspĀ water for the sugar glaze (I forgot about this… and the rolls still tasted delicious!)

1) Preheat oven to 350F and cut 8 squares ofĀ parchmentĀ paper to fit eight muffin tins.
2)Ā Mix the sugar and half of the warm milk in a large bowl.
3) Proof yeast by dissolving 1 teaspoon of sugar in warm milk and then sprinkling yeast on top. Let yeast dissolve and bubble for five minutes.
4) Add 1 cup of flour and lightly beaten eggs to the sugar and milk mixture. Mix until fairly smooth. Then add the proofed yeast and stir to combine.
5) Mix in the rest of the flour in batches until dough comes together. Then move dough onto countertop and knead for 5-10 min. (Note: this dough is very sticky and that’s ok! Just keep flouring your countertop as you knead. If you feel the dough is too liquid-y, add more flour.)
6) Knead in the softened butter a few tablespoons at a time until you have incorporated all of the butter. Place dough back into the bowl, cover with plastic wrap, and refrigerate overnight.
7) As dough rises in refrigerator, make the filling by mixing the chopped apple, brown sugar, ginger powder, and cinnamon together.
8) The next morning, take dough out and set aside to warm up. Then take the dough out (it will probably still be a bit sticky) and roll into a large rectangle.
9) Spread the filling onto the dough and roll the dough up into a long log.
10) Slice the log into eight pieces (or more) and place each piece in a paper lined muffin tin.
11) Let rolls rise for at least 30 minutes or doubled in size.
12) Bake at 350F for 20-25 minutes or until golden brown.
13) Enjoy the rolls straight from the oven or brush with the sugar glaze. (You can quickly make the sugar glaze by placing the sugar and water into a pot and bringing them to a boil for a minute.)

This post has been Yeastspotted.

Holla for Challah! Honey Apple Challah

As I’ve said before, one of the blogs I find inspiration from is Smitten Kitchen. All of Deb’s posts are so beautiful and creative. I have a long list of her recipes I want to try and her honey apple challah was just the one I had to bake right away.

Image

Despite never having eaten challah before, I knew right away that I wanted to bake it. Perhaps it was my inner desire to be Jewish that drew me to this recipe. In middle school, I was invited to a friend’s bat mitzvah. I had never been to one before and knew nothing about Jewish customs except for what I had learned in school (and that Rugrats episode) aboutĀ Hanukkah. My friend’s bat mitzvah opened my eyes to a new culture. That night, I had so much fun learning about Jewish culture (and dancing) that I developed a secret desire to be Jewish or at least have Jewish kids, so that they could have bat or bar mitzvahs!

Image

In addition to becoming a bit more Jewish, I chose this recipe because it seemed pretty straightforward, yet challenging. It was similar to other yeast bread recipes I had looked at before – simple but still difficult. However, I hadn’t read the recipe very closely when I started and missed the fact that the dough needed to riseĀ threeĀ times. Luckily I made this on a Sunday afternoon, so I had time to spare.

The recipes from Smitten Kitchen are very clear and Deb’s notes and photos are very helpful, especially for me who likes to know exactly what to expect. Her series of photos was a great reference as I made the dough, folded in the apple chunks, and braided the loaf. Not sure what happened, but I ended up with enough dough to make two loaves. One was the circular braid featured in Deb’s post and one was a traditional braid.

Image

Image

By the time I got to the step of baking, I was pretty tired. Although I usually find baking relaxing, I felt this time I had bitten off a little more than I could chew. Once I finally put the loaves in the oven, I let out a sigh of relief and relaxed for the 40-45 minutes they baked. I noticed the loaves brown pretty quickly, so you should probably watch them closely when it gets close to 40 minutes. I didn’t want them to brown too much so I took them out before knowing exactly when they were done. Luckily, they baked perfectly, looked absolutely beautiful, and filled my house with the most delicious smell. Baking seems to be one of the best air fresheners for one’s home.

Image

I let the loaves cool overnight and took them to group meeting the next day. The best way to get rid of food is to give it to grad students, so most of my baked goods end up being eaten by my labmates. Since I’ve been regularly baking and bringing in food to lab each week, no one is surprised when another bread or dessert magically appears in lab. Luckily, it hasn’t gotten to the point where they expect me to bring in food each week.

Image

The bread was a little flaky and was easy to pull apart. The top had a nice crunchiness to it and the bread was actually pretty moist, which surprised me a little sinceĀ I noticed the apple chunks dried up quite a bit. So instead of puddles of apple-y goodness that Deb described, they were more like dehydrated apples. Still, the challah was delicious. It had a sweetness that was noticeable, but not overpowering, which I definitely appreciated. I think my sweet tooth has been fading a bit lately.

Although this honey apple challah was fairly labor intensive and time consuming (you should really give yourself a whole afternoon or make the dough ahead of time), it was definitely worth it. The unbaked braided loaves were already beautiful and they became even more beautiful after baking. After pulling the bread out of the oven, I felt so much satisfaction. It blows my mind that one can make such amazing things from such simple ingredients. Baking is almost like magic, transforming flour, eggs, butter, and milk into beautiful, delicious creations. So what if it requires a little elbow grease and time and effort? The finished product is all worth it. The same goes with anything in life. It’s like my mom always told me when life got tough: the things that require hard work are the things in life that are worth it.

This post has been Yeastspotted.